Monday, August 31, 2015

Cherry Tomato Salad

Last summer, I had a "Sweet 100" tomato plant that provided us with so many buckets of cherry tomatoes that we couldn't even eat them all before the fruit flies ate them too and made them rot. Suffice it to say, we had this salad a lot last year!

This year, I didn't purchase tomato plants in time. Not only were the Sweet 100s sold out, but it was late in the season by the time I even got my tomatoes in the ground. Unfortunately that means I haven't eaten a single tomato from my own garden this year. I may not get any. :(

This salad is so good, though, that I had to go out and buy cherry tomatoes just so I could make it before the season ended. It's quite simple, so you can easily whip it up without making dinner take too much time.

Cherry Tomato Salad
Top 8 free!

Ingredients
  • 2 Tbsp red wine vinegar
  • 1 Tbsp olive oil
  • 1/2 tsp coarse salt
  • 1/8 tsp ground pepper
  • 2 pints halved cherry or grape tomatoes
  • 1/4 cup finely chopped red onion
  • 2 Tbsp finely chopped fresh parsley

Directions
Chop all veggies and then mix them together.


Whisk together vinegar, oil, salt, and pepper until combined.

Toss to combine all ingredients.

Enjoy with your favorite entree.


I told you it was simple!

Kudos to my Aunt Catherine for sharing this recipe with me in the first place.

How are you helping summer linger this week?

Linking up at Allergy Free WednesdaysGluten Free Fridays, and Corn-free Everyday

Friday, August 28, 2015

Our First FARE Walk!

I think I've mentioned it before, but I didn't feel terribly drawn to the Food Allergy Community until my kids started going off to school. That's when I was forced to acknowledge that the rest of the world isn't as knowledgeable nor as accepting of food allergies as my family and close circle of friends. That's when I really discovered the need for advocacy and outreach, and when Hubby and I came up with the idea for Allergy Superheroes.

And that's why, even though I've dealt with food allergies for more than 30 years, I'd never been to a FARE Walk before.

We went as Team Allergy Superheroes this year, and we had a great time! We learned a lot too, and perhaps we'll even sponsor our local walk in the future. This year, though, we just enjoyed chatting with other Food Allergy Families and scoring free goodies from all sorts of allergy-friendly companies!

The boys enjoyed meeting this peanut-allergic elephant.

It was great to meet a representative of one of our favorite peanut-free brands, Sunbutter!

We also loved meeting the people behind Don't Go Nuts, another Colorado company that we'd like to get more involved with in the future!

The crowd gathered for opening announcements. I think we had a pretty good turn out.

Of course we had a great turn out, if celebrities like Anna and Elsa showed up!

The walk route was a pleasant loop around Wash Park in Denver.


There's that elephant again, cheering us on.

The crowd thinned out as the walk went on, as people moved at different speeds, but it was fun to see the Wash Park trail fill up with blue shirts.


This mile was sponsored by our own allergist's office!

It's much harder to see on camera, but I loved seeing the blue shirts reflected in the lake.

We stopped to chat with some volunteers at one of the water stations along the way. They were very friendly :)

There was no information on the website about how long the route was, so I decided to use MapMyRide (but set to walk) to find out the length.

Unfortunately, I forgot to end the route the moment we got back, so there's a tiny bit of extra mileage in there. I'd didn't walk that far before I figured it out though, so I'd say the walk was probably 2.25 miles.

In addition to all the free samples from sponsors and allergy-friendly companies, there were snow cones available at the end!

There was also a free train ride. Did somebody say "train"??!!!!!!

The boys after the event--their new bags are filled with goodies. If something's free, my kids will grab it!

There were quite a few goodies for all of us, in fact. We loved getting to try some foods we've heard about but haven't purchased yet! Here's a sampling of our swag.

And the items the boys claimed all for themselves.


I'll end this recap with my favorite pic of the day. FARE gave out wristbands to all participants: teal for those of us with food allergies, and dark blue for the people who love us. There were a lot of folks with food allergies at the walk, but there was also a whole lotta love!

Wednesday, August 26, 2015

Allergy Superheroes at Vegetarian Mamma - Review and GIVEAWAY!

The wonderful Cindy Gordon over at Vegetarian Mamma has offered up a review of our products!

Click here to see it!

I love this picture of her son with one of our buttons :)

And the best part is she's hosting a giveaway for one of our shirts, a button, and a sticker pack! (Gender, size, and allergen(s) of winner's choice.) So head on over to her blog and enter for your chance to win!

Thanks again, Cindy!

And remember that we've got a promotion going on through Labor Day in honor of Back to School!

Use the code BACKTOSUPER for 15% off your order!

Monday, August 24, 2015

Homemade Fondant

I've never been a huge fan of fondant icing. It's probably more of a texture thing than anything, but I prefer cake icings to be rich and creamy, and generally more smooth than fondant.

However, when it comes to decorating cakes, fondant can go to so many more places than regular icing, which is why I sought out a fondant recipe a little over a year ago, when I wanted to make a fondant box of crayons spill out onto the surface of a chalkboard cake.

I found this recipe, and was amazed at how easy it was to make!

The original recipe called for an entire bag of powdered sugar. That was way more fondant than I will ever need at one time, and so I've scaled it back appropriately. In fact, I'm including four columns of ingredient proportions, depending on how much fondant you think you'll need.

If you only plan to make a little for decoration purposes (this is what I did for each color in my crayons) you would be wise to get this set of measuring spoons first, or something equivalent. These allow for precise measuring of very small amounts. A dash is 1/8 tsp, a pinch is 1/16 tsp, and a smidgen is 1/32 tsp.

Once again, this recipe contains shortening. I don't like shortening as I don't like hydrogenated fats, but I decided it was worth it for a once-in-a-great-while recipe. Maybe someday I'll find a healthier substitute. If you know of one, please share!

One last note, if you're making smaller amounts of several different colors, make each batch separately. It's much harder to make the color uniform if you try to add color after the fondant has turned into dough.

Homemade Fondant
This recipe contains soy.

Ingredients


Directions
In a bowl, stir together the corn syrup, shortening, and coloring until smooth and uniform.

Mix in the salt and vanilla.

Gradually add the powdered sugar until you have a stiff dough.

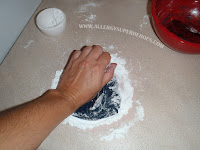
Once the dough begins to clean itself from the sides of the bowl, transfer to a counter and knead in remaining sugar (or use the dough hook attachment if you have a stand mixer.) If the dough remains sticky, add more powdered sugar until it is smooth and no longer sticks.

Roll out the fondant between two layers of waxed paper until approximately 1/8 inch thick.


This was a "Large deco" sized batch
Cut into shapes, if desired, and then chill in the fridge (still between waxed paper) until ready to use.
This batch was actually halfway between "8-9" round" and
"Large deco." And it still frosted a 9" round just fine,
although I rolled it pretty thin
Fondant must be chilled to hold its shape--small shapes, in particular, will tear if you try to move and shape them at room temperature.

You MUST have a layer of regular frosting on the cake for the fondant to stick. Just use your favorite, whether homemade or from a jar.

Remove fondant from the fridge and carefully remove the top layer of waxed paper. Gently lift entire sheet of fondant from under the waxed paper and flip it over onto the frosted cake.

Smooth from the middle and down the sides, trimming and overlapping where necessary. Don't be afraid to patch any tears with pieces of trimmed fondant.

Remove embellishments from the fridge and carefully place on the cake in desired positions.

Store any excess in a tightly sealed container in the fridge.

Enjoy your cake! Fondant can be used to make all sorts of fun frosting shapes!

I originally found this recipe here.

Linking up at Allergy Free Wednesdays and Gluten Free Fridays

What sort of frosting do you prefer on cakes?